
The beginning of a project is about imagining and planning
The best way to start is to pick a theme, this will help you narrow down your ideas. Once you have a theme you can start to sketch your project and develop a plan. Since this is a team project, part of your plan should be to divide up jobs. When you look at the outline of this project, we are at step 1 and 2.
Outline of the Steps for this Project
- Pick a theme
- Do some rough sketches, layout the design.
- Design obstacles
- Build Base (add hole optional here)
- Build Obstacles
- Put base and obstacle(s) together and refine
- Add hole (if not added already)
- Wiring
- Refine
- Painting and Art
- Refine
Pick a theme and do some rough sketches
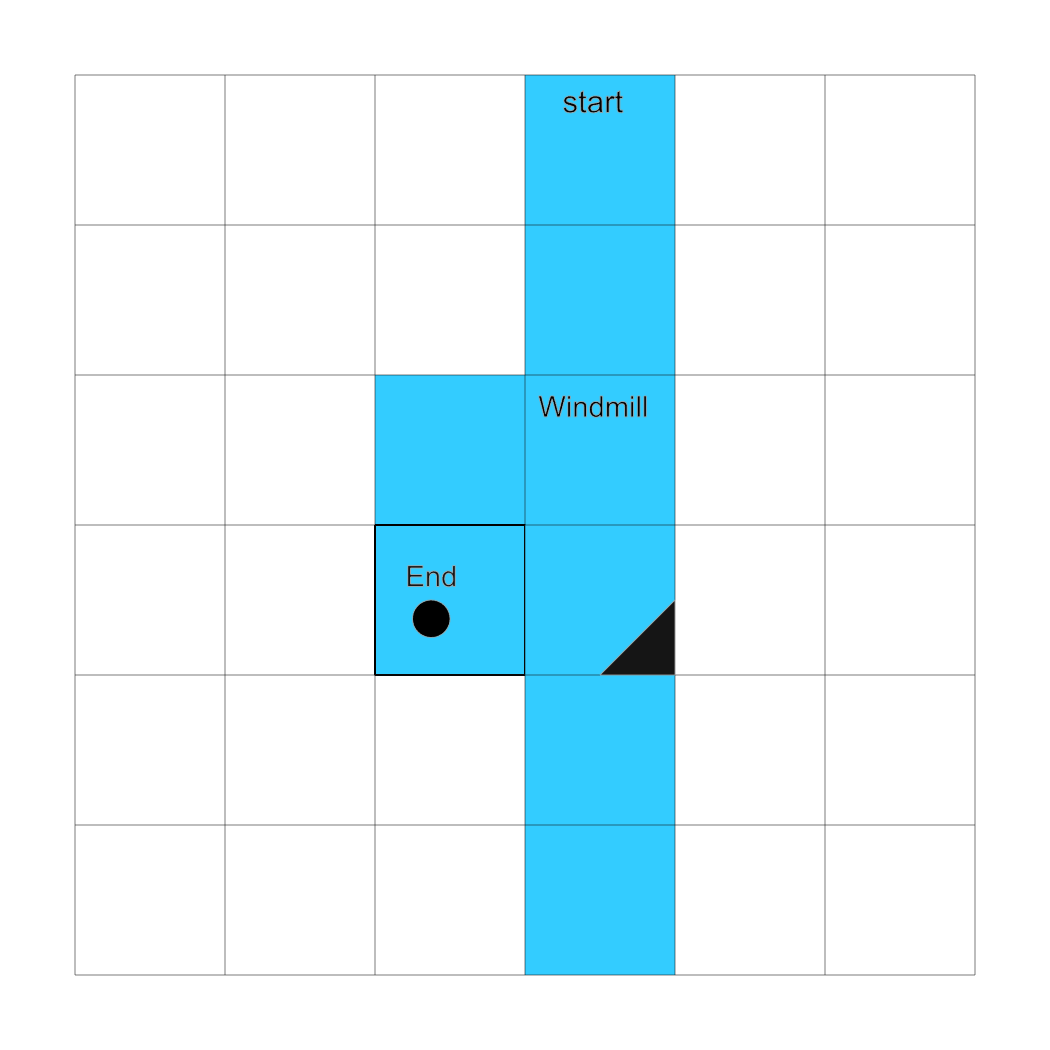
Start by laying out and sketching the design of your mini-golf course. Use the layout page to draw your overall shape and features. Your sketch will need to have these elements:
- Start or the hole
- Cup, hole, or obvious end of the course
- Obstacle or challenge for the course
- Walls to keep the ball on your course
- A micro-controlled motorized element
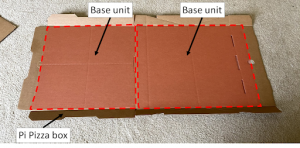
The pizza boxes will be used as the base or turf of the hole. The Woodard boxes are for structures.
To lay out your golf course hole we are going to use graph paper with each square equal to 1/2 pizza box open or the whole pizza box if it was closed.
Jobs
It is a good idea to divide the project into jobs. Here are some examples of jobs for this project:
- Coding
- Obstacle construction
- Layout Construction (turf, start, finish, walls)
- Art and Design
- Course engineering and wiring
A basic example of dividing labor:
We had a three person team. Everyone worked together on design and course engineering. Two of us worked on layout construction, one of us made the start, the other made the end. The third person made the windmill, coding and wiring. No painting was done 🙂 We brought it all to one place to assemble and wire. It took about 20 minutes fit it all together while making some minor modifications.


Tips for a good mini golf hole
- You will need to raise the turf to the height of the cup you are using for the hole. Decide if you want the whole course at that level or a ramp built in somewhere. A yogurt cup is a perfect cup for your hole.
- Make it playable – it should be easy to figure out and maneuver.
- Hole in one should be possible and no more than 4 mandatory hits to finish.
- Don’t make your walls higher than necessary.
- To finish on time take look at the steps above, think about how many weeks it will take to complete each part, and add them up.