
Motors
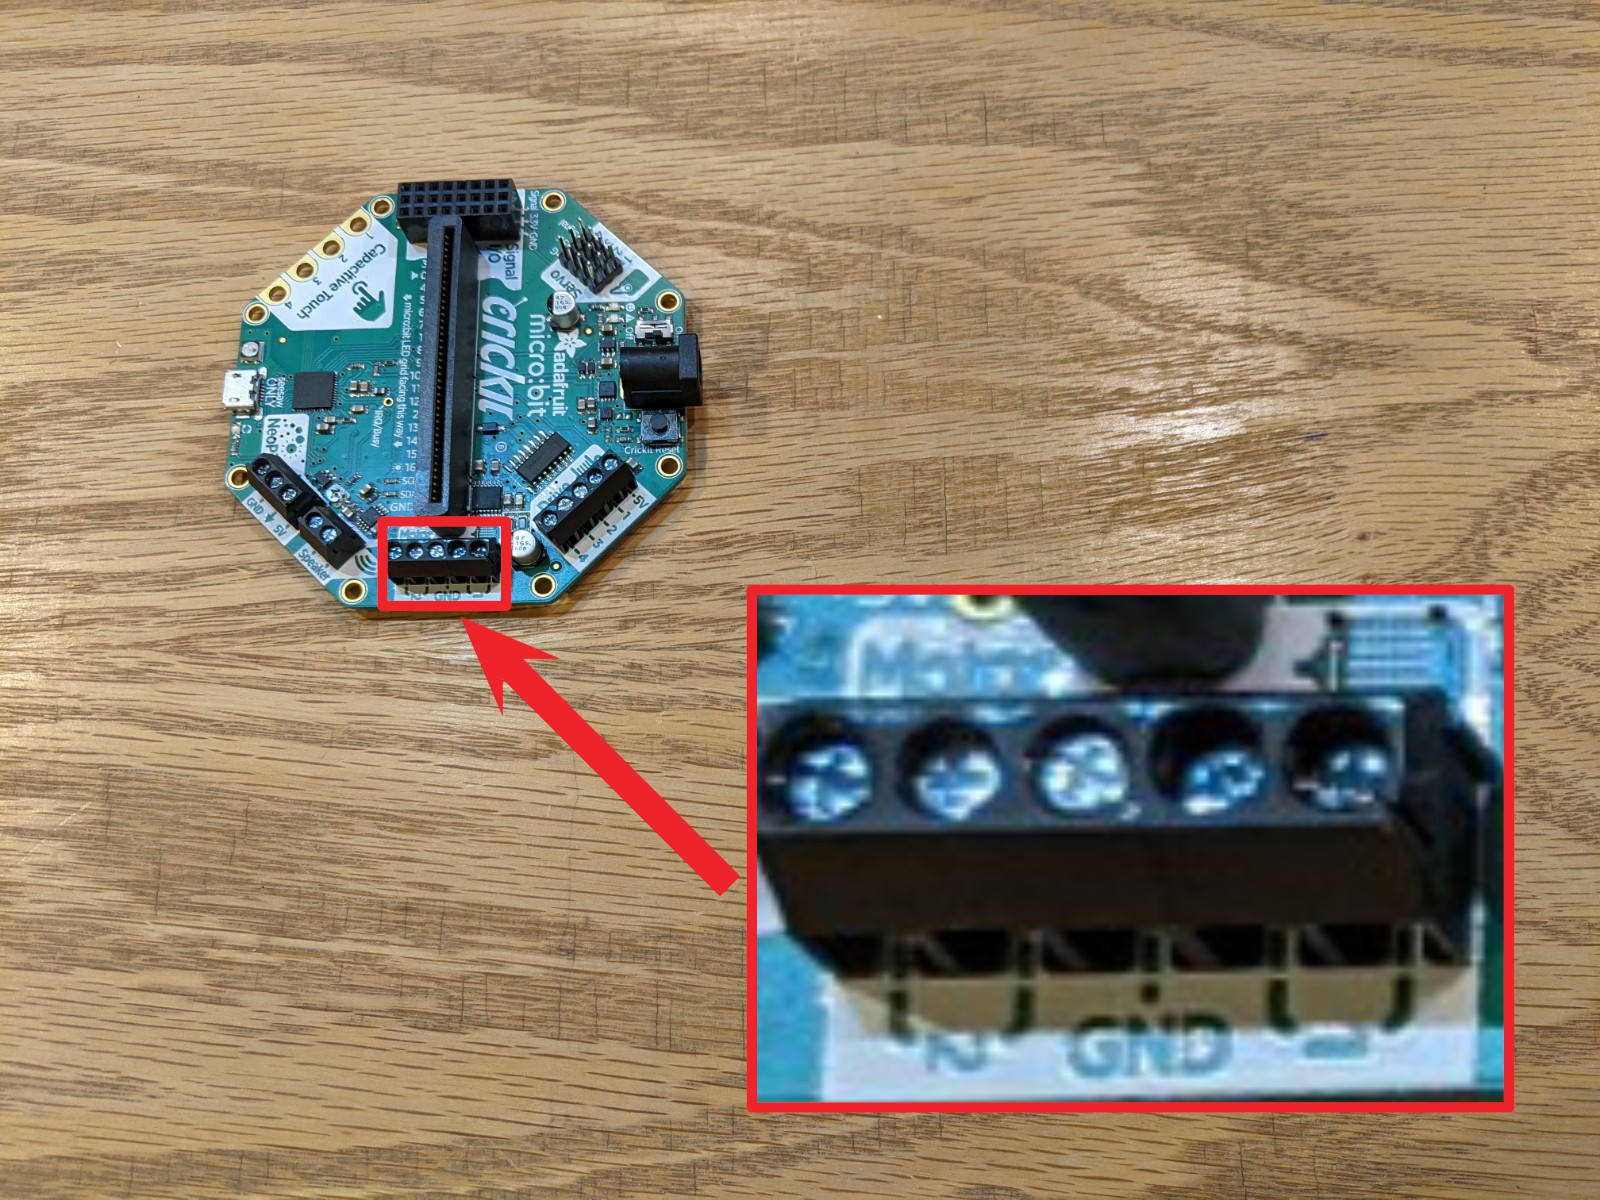
Motors connect to the Crickit on the posts labeled “Motors” as shown in this picture.
The Crickit has posts for 2 motors. We will be using the posts for motor 1 in this lesson.
The order you put the wires will set the direction of the motor. We can also change the direction in the code.

Connect the two TT motor wires to the motor 1 posts on the Crickit. It does not matter which color wire goes in the slot at this stage.
Insert the Mico:bit into the Crickit and load the Crickit extension. If you need help please refer to this guide:

Once you have installed the Cricket extension in MakeCode, you should have a green CRICKIT block group available. Clicking on that group reveals various blocks for Crickit capabilities including those related to motor control.
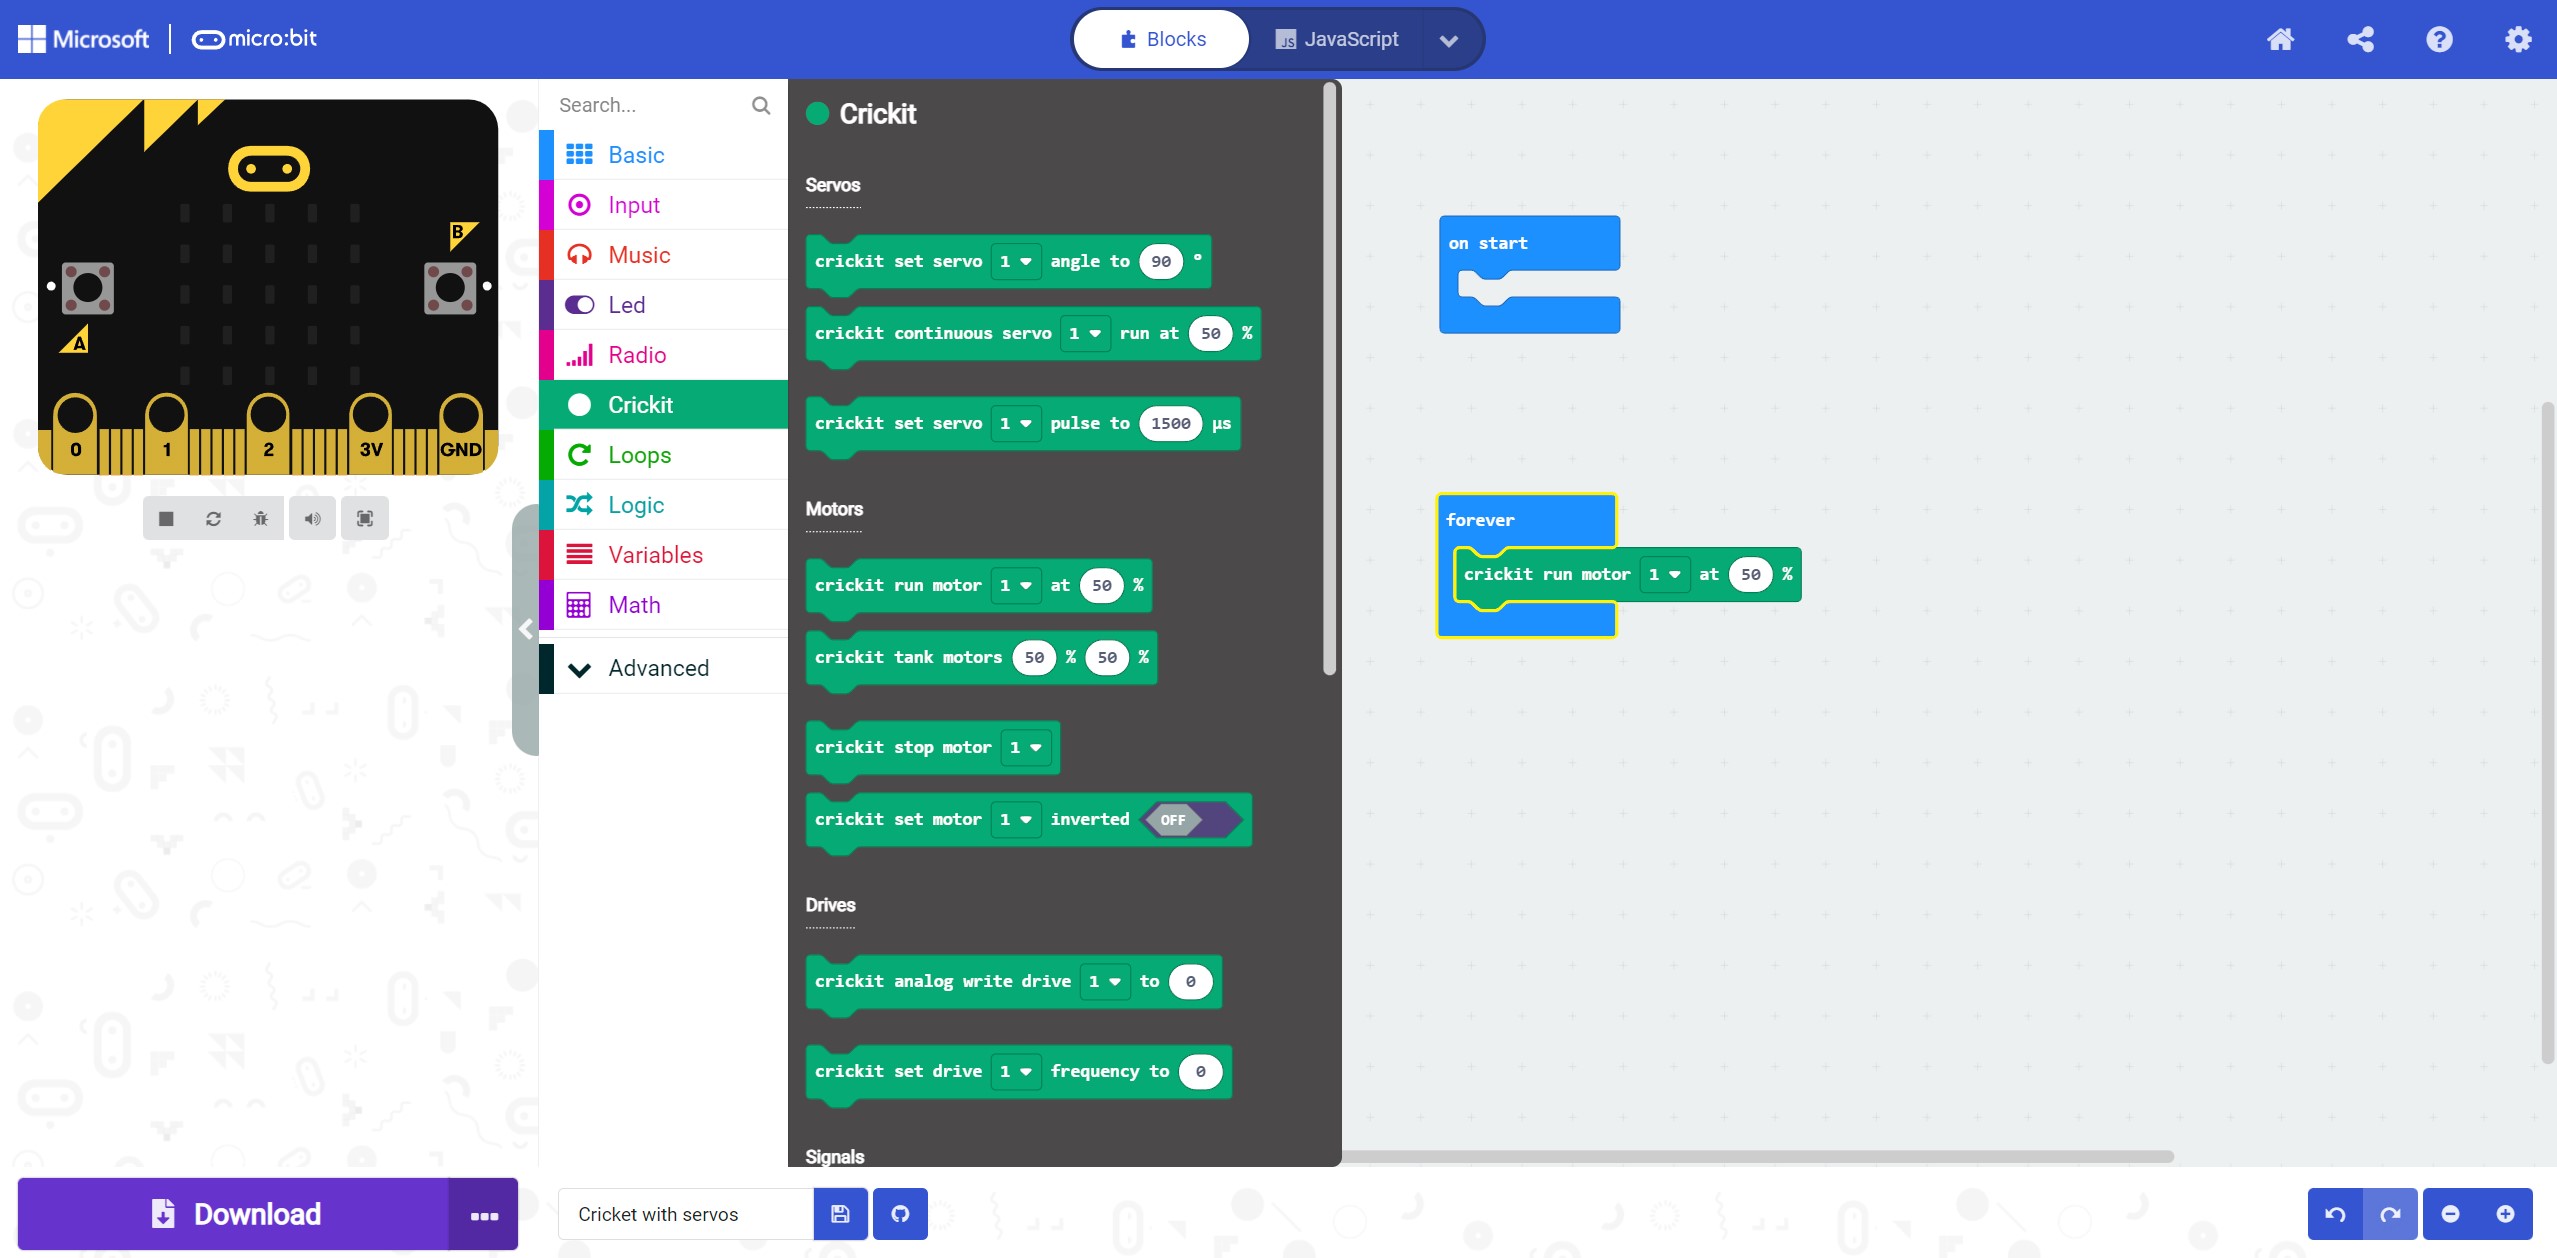
Code to move a motor:
Click on the green Crickit block group and drag the “crickit run motor” block into the “Forever loop”.
- Change the speed by adjusting the percentage.
- If the motor is running the wrong way you can use a negative percentage.
Servos
Servos are motors that can sense their position. They can turn and stop at a programmed point.
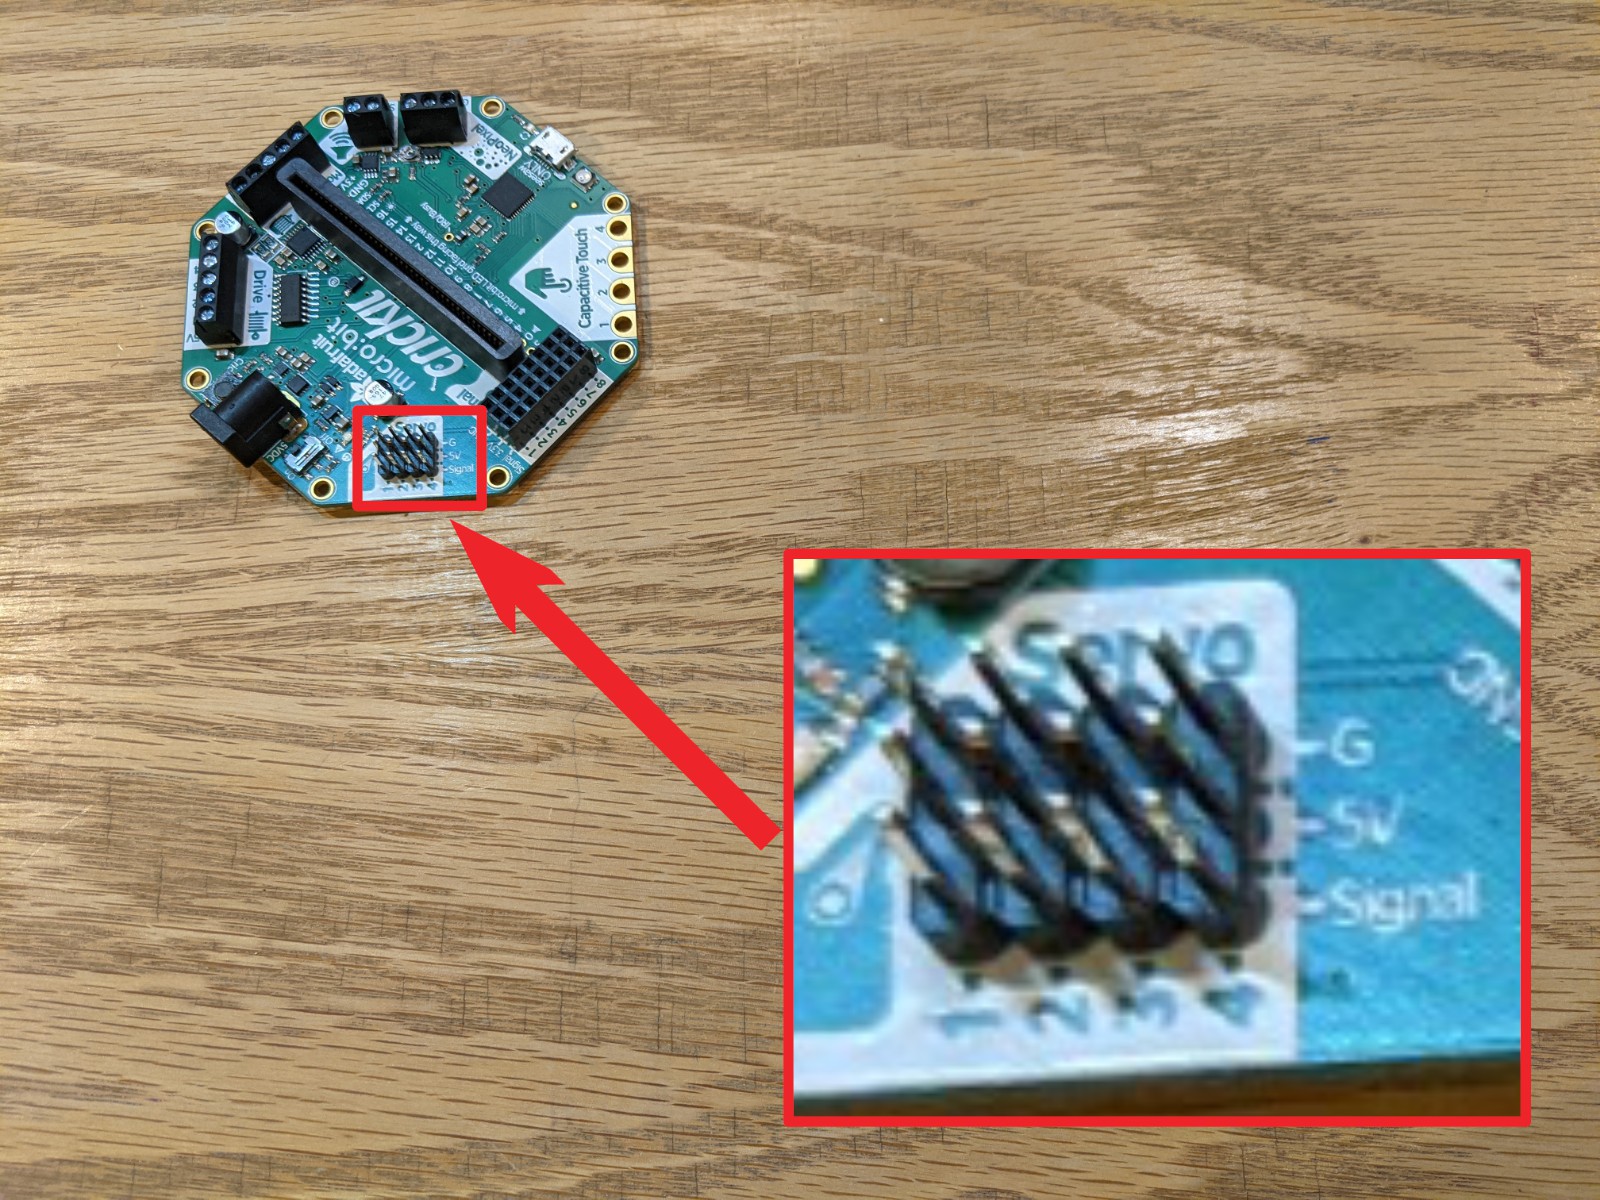
Servos are connected to the posts labeled “Servo” on the Crickit as shown in this picture.
The Crickit can accommodate 4 servos as labeled in the picture.
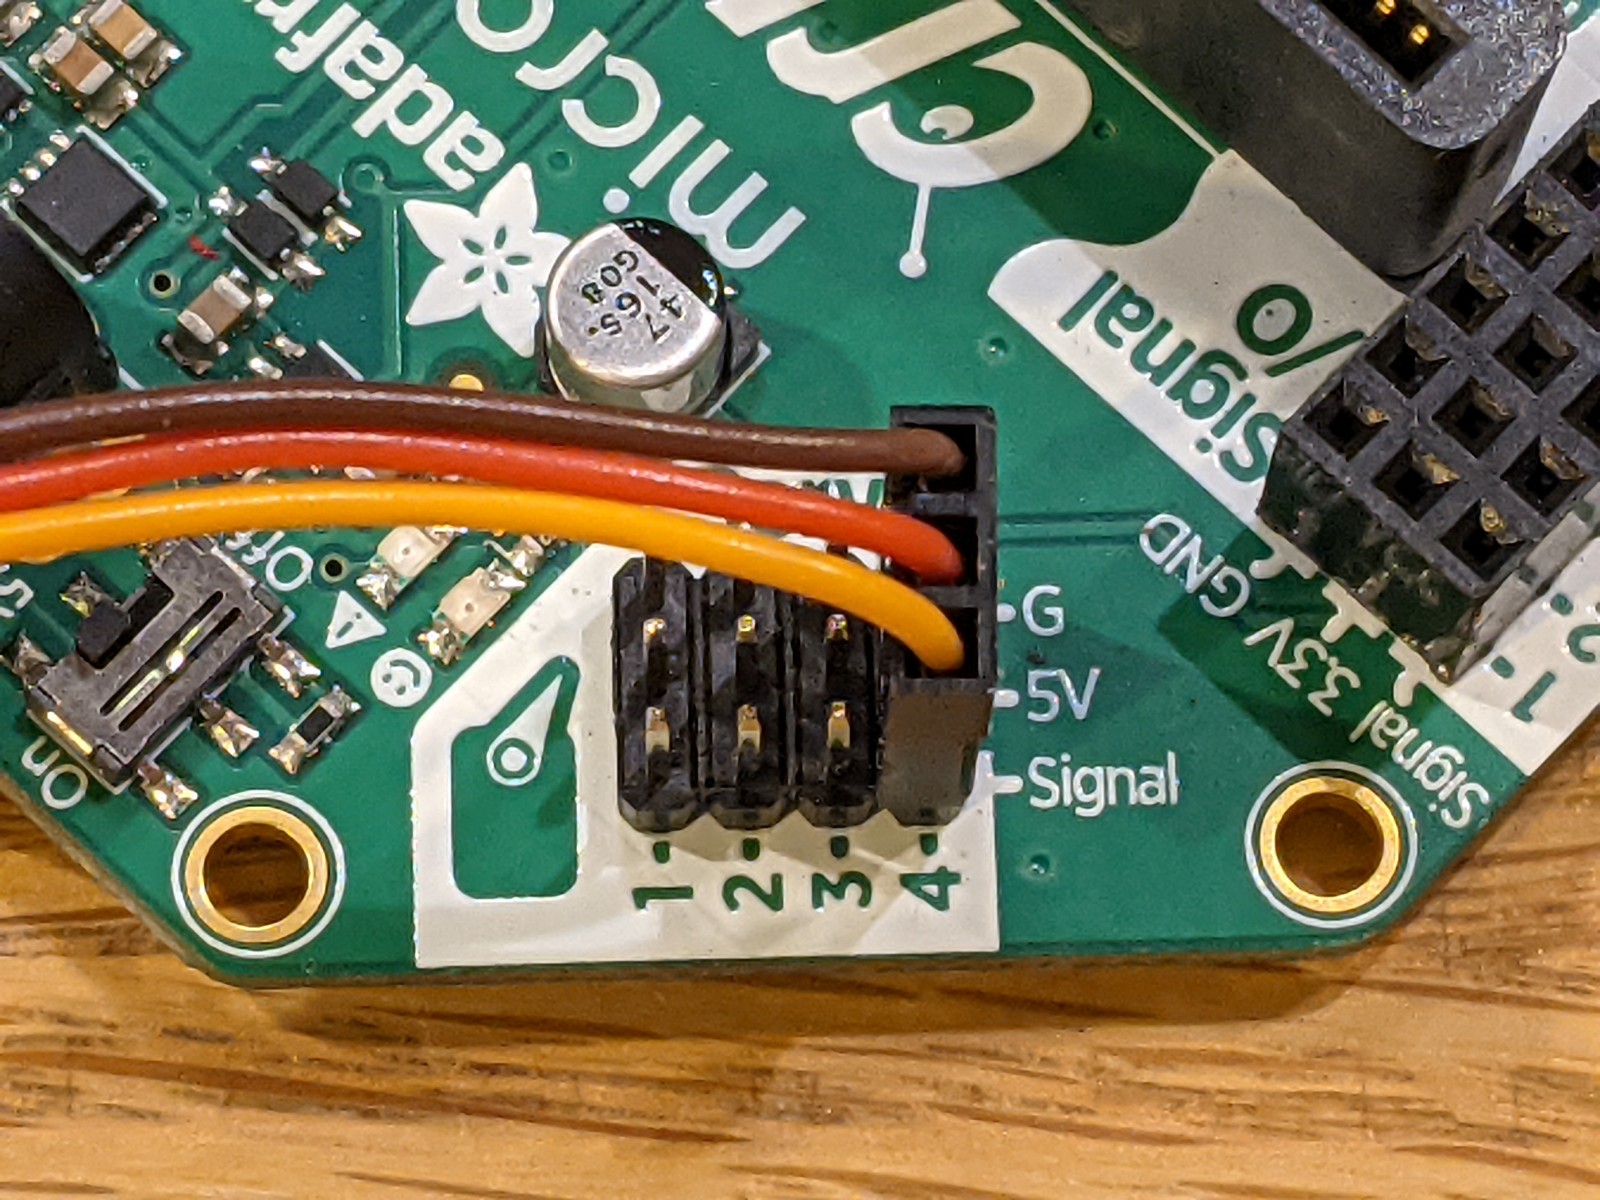
In this picture we plugged the servo into spot “4” on the Crickit. While plugging your servo into the posts align the brown (or black) wire with the “G” on the Crickit. Align the red wire with the “5v“. Align the Yellow (or orange) wire with “Signal“.
Insert the Mico:bit into the Crickit and load the Crickit extension. If you need help please refer to this guide:
Once you have installed the Cricket extension in MakeCode, you should have a green CRICKIT block group available. Clicking on that group reveals various blocks for Crickit capabilities including those related to servo control.
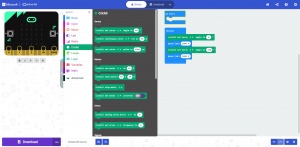
Code a servo:
- Click on the green Crickit block group and drag the crickit set servo block into the Forever loop.
- Set the servo number to the post number you plugged your servo into on the Crickit.
- Set the angle you want your servo to start at
- Set a pause so the servo has time to move to the position. The pause is found in the Basic block group.
- Drag another crickit set servo block to the forever loop and set the servo number to the same servo as above.
- Change the angle to a different angle so you can see the servo move.
- Add anther pause so the servo has time to move.